
Equipment
Contents
Camera
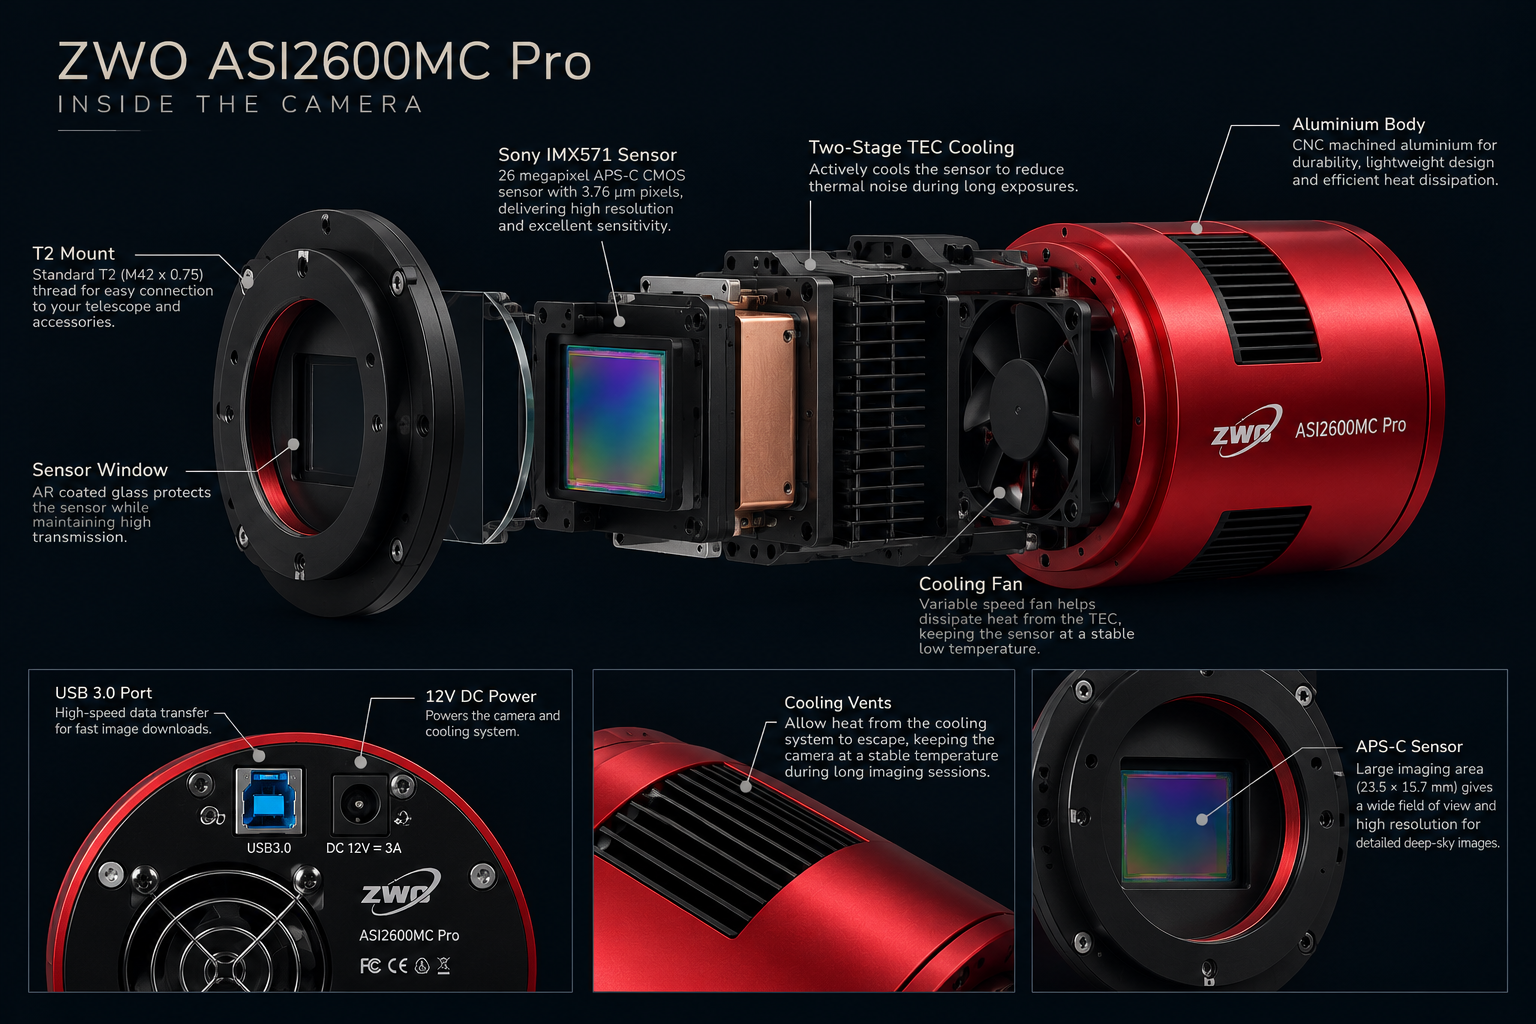
The ZWO ASI2600MC Pro is the heart of my deep-sky imaging setup. Its 26-megapixel APS-C sensor captures fine detail across nebulae and galaxies, while active cooling helps control thermal noise during long exposures.
Shooting in colour means I can capture red hydrogen-alpha and blue-green oxygen emissions using my ZWO duo-band filter, revealing the structures and colours hidden in the night sky. I started off with a modifed DLSR but soon found it frustrating to have to take callibration frames at the end of every session. Dark, clear nights were rare enough without having to spend time capturing dark frames as well as light frames.
Sensor: Sony IMX571 APS-C CMOS
Resolution: 26 megapixels
Pixel size: 3.76 μm
Cooling: Two-stage TEC cooling
Colour: One-shot colour (OSC)
Why I chose the ASI2600MC Pro
I started my astrophotography journey with a regular DSLR camera. It was a good way to get started, but I soon discovered that capturing deep-sky objects involves more than simply pointing a camera at the night sky.
To photograph faint nebulae and galaxies, you need to collect as much light as possible. This means taking long exposures, often lasting several minutes. During these exposures, the camera sensor generates thermal signal, which contributes to noise in the final image.
One way to deal with this is to take what are known as dark frames. These are photographs taken with the camera covered, using the same exposure duration and ISO as the images of the sky. Ideally, the sensor temperature should also match as closely as possible. The dark frames record thermal signal and repeatable sensor imperfections, allowing software to calibrate them out of the actual photographs.
It’s an effective technique, but it adds another job to an already complicated process. When you’ve finally got everything set up and the skies are clear, the last thing you want to do is spend valuable imaging time taking photographs with the lens cap on. Dark frames can be captured separately, but matching the temperature of an uncooled DSLR sensor can be difficult. Other calibration frames, such as flats and bias frames, may also be useful depending on the camera and workflow.
Living so close to the coast, I don’t get as many clear nights as I’d like. I wanted to make the most of every opportunity rather than add more complexity to an already challenging hobby.
So, with the support of a very understanding wife, I decided to invest in a dedicated, cooled astronomy camera: the ZWO ASI2600MC Pro.
Its 26-megapixel APS-C sensor gives me a generous field of view with my Askar 71F telescope. This was an important consideration when I was comparing cameras, because sensor sizes vary considerably between models.
A smaller sensor captures a smaller area of the sky when paired with the same telescope. That means less of a large nebula or galaxy will fit into a single frame, potentially requiring a longer focal-length decision to be reconsidered or a mosaic of multiple images to capture the whole target. I wanted a sensor that would let me photograph larger objects and include some of the surrounding sky, without having to stitch multiple panels together. The ASI2600MC Pro’s APS-C sensor, measuring 23.5 × 15.7mm, offered a good balance of field of view, resolution and image quality for my 490mm Askar 71F.
The camera’s regulated, two-stage cooling helps keep the sensor at a consistent temperature and substantially reduces thermal signal. This makes noise management easier and allows me to collect more consistent data across multiple imaging sessions. The camera also has very low read noise and zero-amp-glow circuitry, which are useful advantages when capturing faint objects over long exposures.
I chose a one-shot colour camera because it offers a relatively straightforward workflow without the need for a separate filter wheel and multiple sets of colour exposures. Combined with my ZWO duo-band filter, it allows me to capture the hydrogen and oxygen emissions that reveal the distinctive colours and structures of many nebulae.
For me, the ASI2600MC Pro strikes the right balance between image quality, field of view, practicality and simplicity. Most importantly, it helps me spend more of those precious clear nights doing what I actually bought all this equipment for: photographing the universe.
Main Telescope
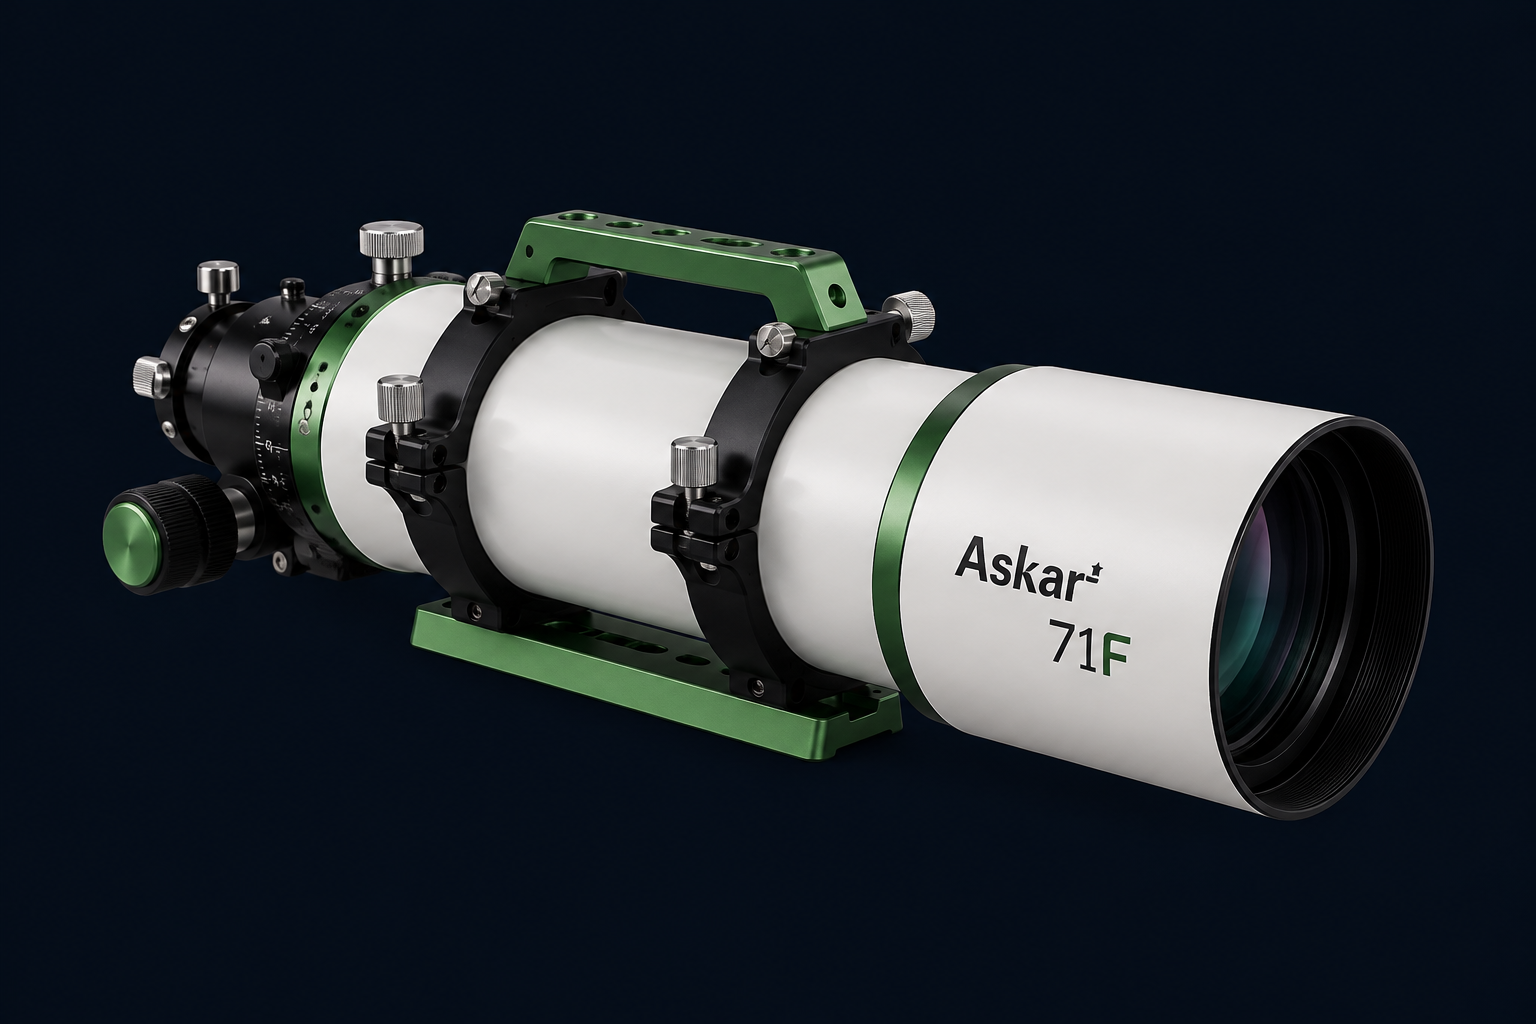
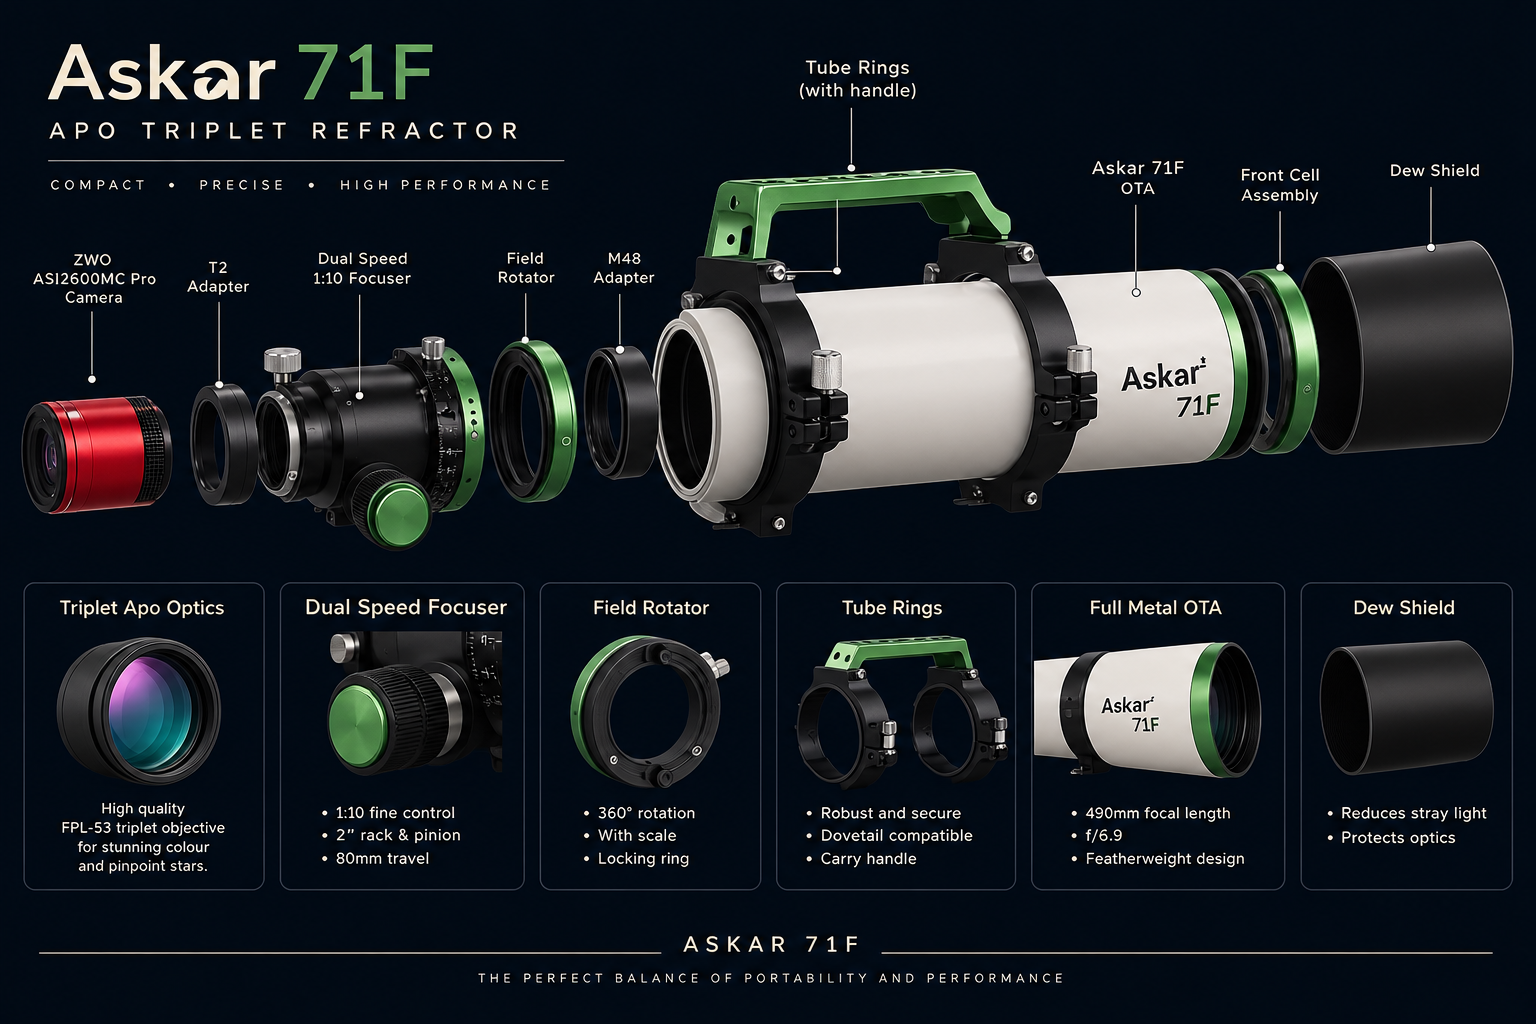
Choosing my first dedicated astrophotography telescope came down to a few important factors. I wanted something that would let me capture wide-field images of deep-sky objects, from large nebulae and intricate clouds of gas to the wider regions of sky surrounding them. With its 490mm focal length and 71mm aperture, the Askar 71F seemed to offer the balance I was looking for, pairing a generous field of view with enough detail to bring out the structure within my targets.
Price was another major consideration. Astrophotography can be an expensive hobby, and I needed a telescope that fitted within my budget without feeling like I was compromising on the quality of the optics. The Askar 71F also had encouraging reviews from people who knew what they were talking about.
Its quadruplet apochromatic optics and built-in field correction were further attractions, helping produce sharp stars across the image without needing to buy a separate field flattener for my usual setup. That meant less additional equipment to research, buy and configure.
In the end, the Askar 71F felt like the right choice: a capable, well-regarded telescope at a price I could justify, with the wide-field view I wanted to explore the night sky. It has given me a solid foundation to learn, experiment and keep improving my astrophotography.
Guide Scope & Camera
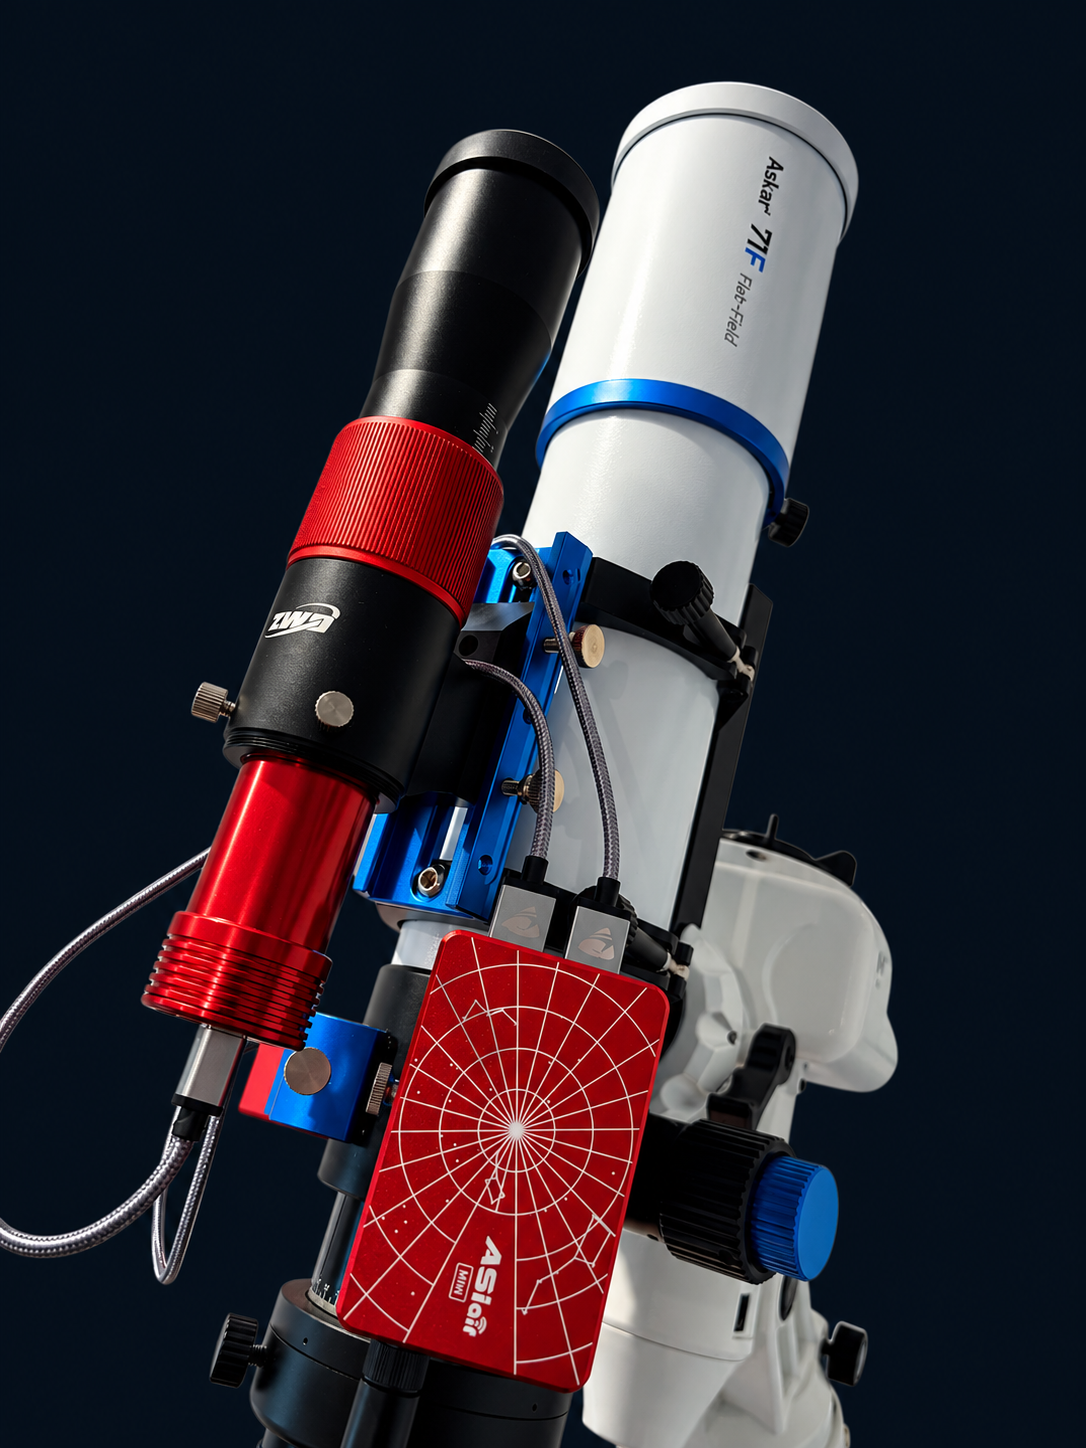
Accurate tracking is essential when photographing distant galaxies and nebulae, where exposures can last several minutes. My guiding setup uses a ZWO 30mm f/5 Mini Guide Scope (150mm focal length) paired with a ZWO ASI120MM Mini monochrome camera to continuously monitor the movement of guide stars.
Without guiding, tiny tracking errors in the mount can cause stars to drift, elongate or appear slightly out of focus in long exposures, reducing the fine detail captured in an image. The guiding camera takes frequent images of a selected star, while the ASIAIR Mini analyses its position and sends precise corrections to my Sky-Watcher EQ-AL55i Pro mount.
These adjustments compensate for small mechanical inaccuracies and tracking deviations, helping keep stars round and sharp throughout each exposure. The result is greater consistency across imaging sessions and a more reliable foundation for building detailed deep-sky images from hundreds of individual frames.
Mount
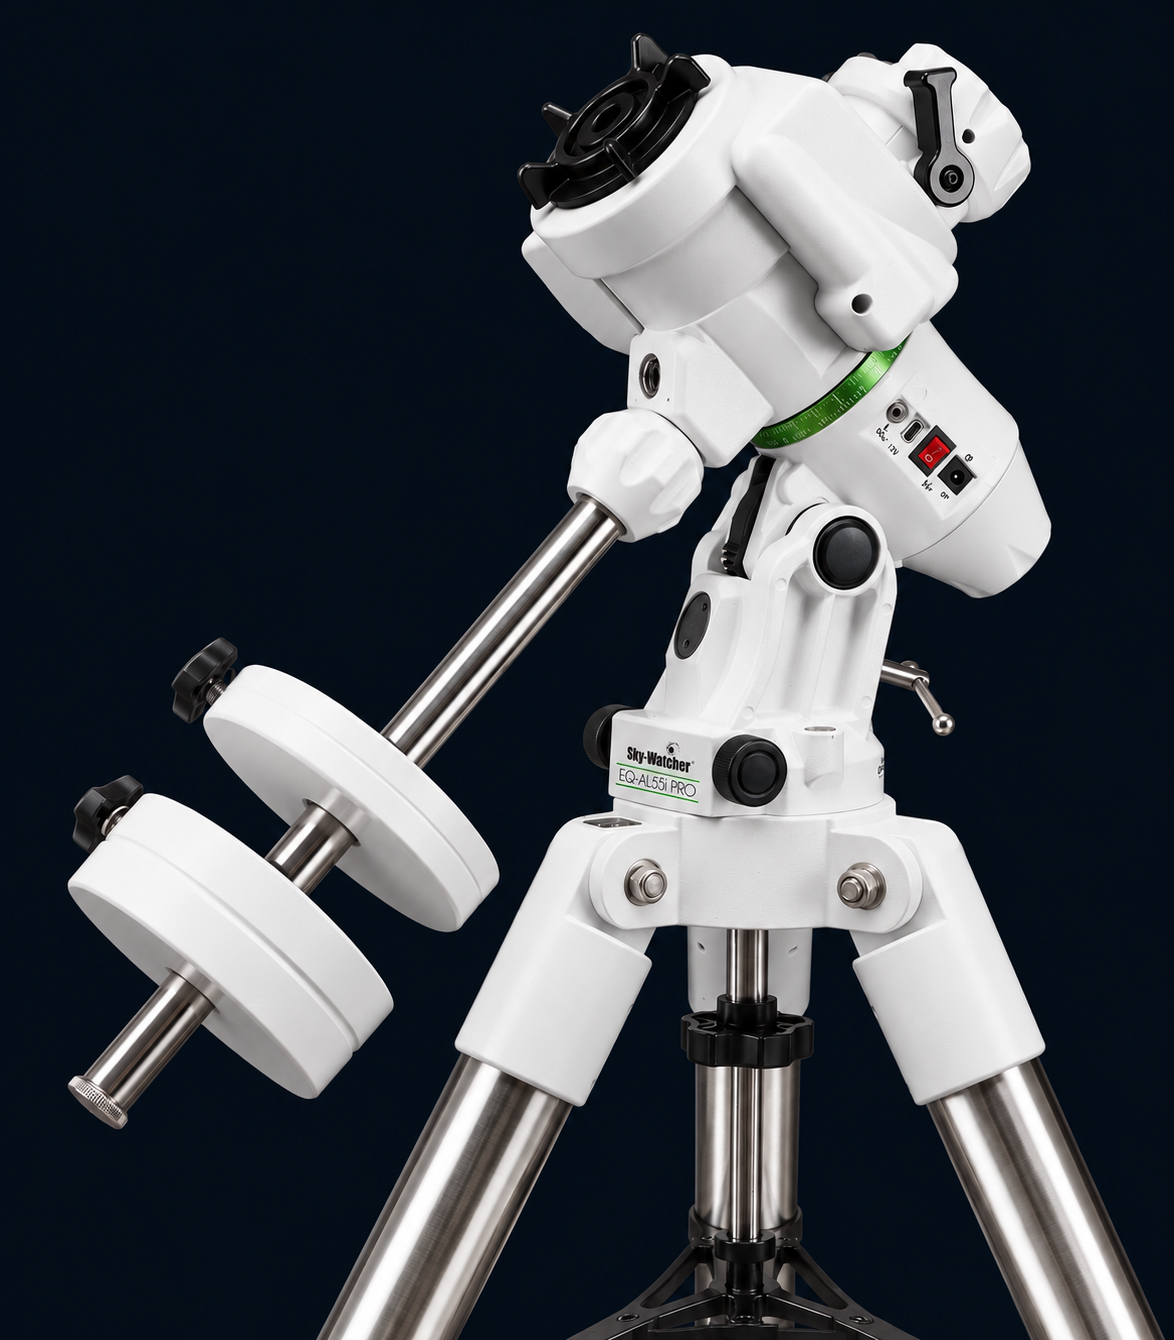
The Sky-Watcher EQ-AL55i Pro is the foundation of my astrophotography setup, providing a motorised equatorial mount designed to track celestial objects as they move across the night sky. Accurate tracking is essential for capturing the long exposures needed to reveal the faint detail in galaxies and nebulae, while its built-in Wi-Fi connectivity allows control through the ASIAIR Mini.
For the price, I think it offers a good balance of portability, payload capacity and functionality. It isn’t excessively heavy to transport and set up, yet it has a decent weight capacity for my Askar 71F, imaging camera and guiding equipment.
However, it isn’t without its frustrations. I’ve noticed that around 10% of my subframes can be lost due to guiding errors, although guiding performance depends on several factors and isn’t necessarily down to the mount alone. Polar alignment can also be fiddly. The altitude adjustment mechanism, which raises and lowers the mount to set its latitude, can sometimes lurch downwards rather than move smoothly. This makes fine adjustments during polar alignment more difficult than I’d like.
Overall, the EQ-AL55i Pro offers good value for money, with a useful payload capacity and manageable weight for a portable imaging rig. It has served as a capable platform for my deep-sky astrophotography, but the less refined altitude adjustment and occasional guiding issues are worth considering if you’re looking for consistently reliable performance.
Unfortunately, my experience with the EQ-AL55i PRO has been disappointing. After just seven months, the mount has been returned to the supplier following a serious problem with the RA axis, which appeared to lock up completely.
The problem became apparent after several frustrating imaging sessions where guiding was behaving erratically and repeatedly struggled to track targets reliably. I lost two precious nights of clear skies trying to resolve the issue, which is particularly frustrating given how limited clear nights can be here on the North West coast of England.
The mount had also suffered from recurring DEC guiding issues before this latest problem. I was operating well within the mount’s stated payload capacity, and it certainly hadn’t been subjected to heavy or continuous use given the local weather conditions.
The mount was sent back to the supplier for assessment and repair. They confirmed the RA gears were locked solid and sent a replacement. A mount at this price point should provide reliable tracking, particularly when used within its specified limits. Essentially, it has one job and it doesnt seem to manage that very well.
For now, this experience has left me disappointed. Clear nights are too valuable to spend troubleshooting equipment that should be working reliably, and the recurring issues have made it difficult to have confidence in the mount.
For anyone starting out in astrophotography, choosing equipment is a difficult decision. It’s an expensive hobby to get into, and when you’re first starting out, you simply don’t know whether it will become something you stick with for years or something you eventually lose interest in. Compromises are inevitable, and I think the EQ-AL55i Pro is a good example of that. It gets you started without the expense of a more capable mount, but you are making compromises. Its payload capacity will ultimately restrict your ability to upgrade to larger telescopes, meaning that if you progress in the hobby, you’ll probably find yourself buying another mount anyway. Guiding accuracy can also be frustrating, and there are certainly more capable and accurate mounts available, but they come at a higher price. The old saying ‘buy cheap, buy twice’ comes to mind, and I suspect that’s particularly relevant here. If you stick with astrophotography, there’s a good chance you’ll want something better eventually. That said, every image on this website has been captured using this mount, so it’s clearly capable of producing results. You just need patience, an acceptance that a regrettable number of subframes may end up in the bin, and realistic expectations about exposure lengths. Pushing towards longer exposures will place greater demands on the mount and, in my experience, increases the risk of losing valuable subframes. That’s time wasted on nights when clear skies are already hard enough to come by. So yes, I will be upgrading, and no, I won’t particularly miss this mount when I do. But it has got me started, helped me learn an enormous amount and allowed me to produce images I’m genuinely pleased with. Perhaps that’s enough for now.
Controller
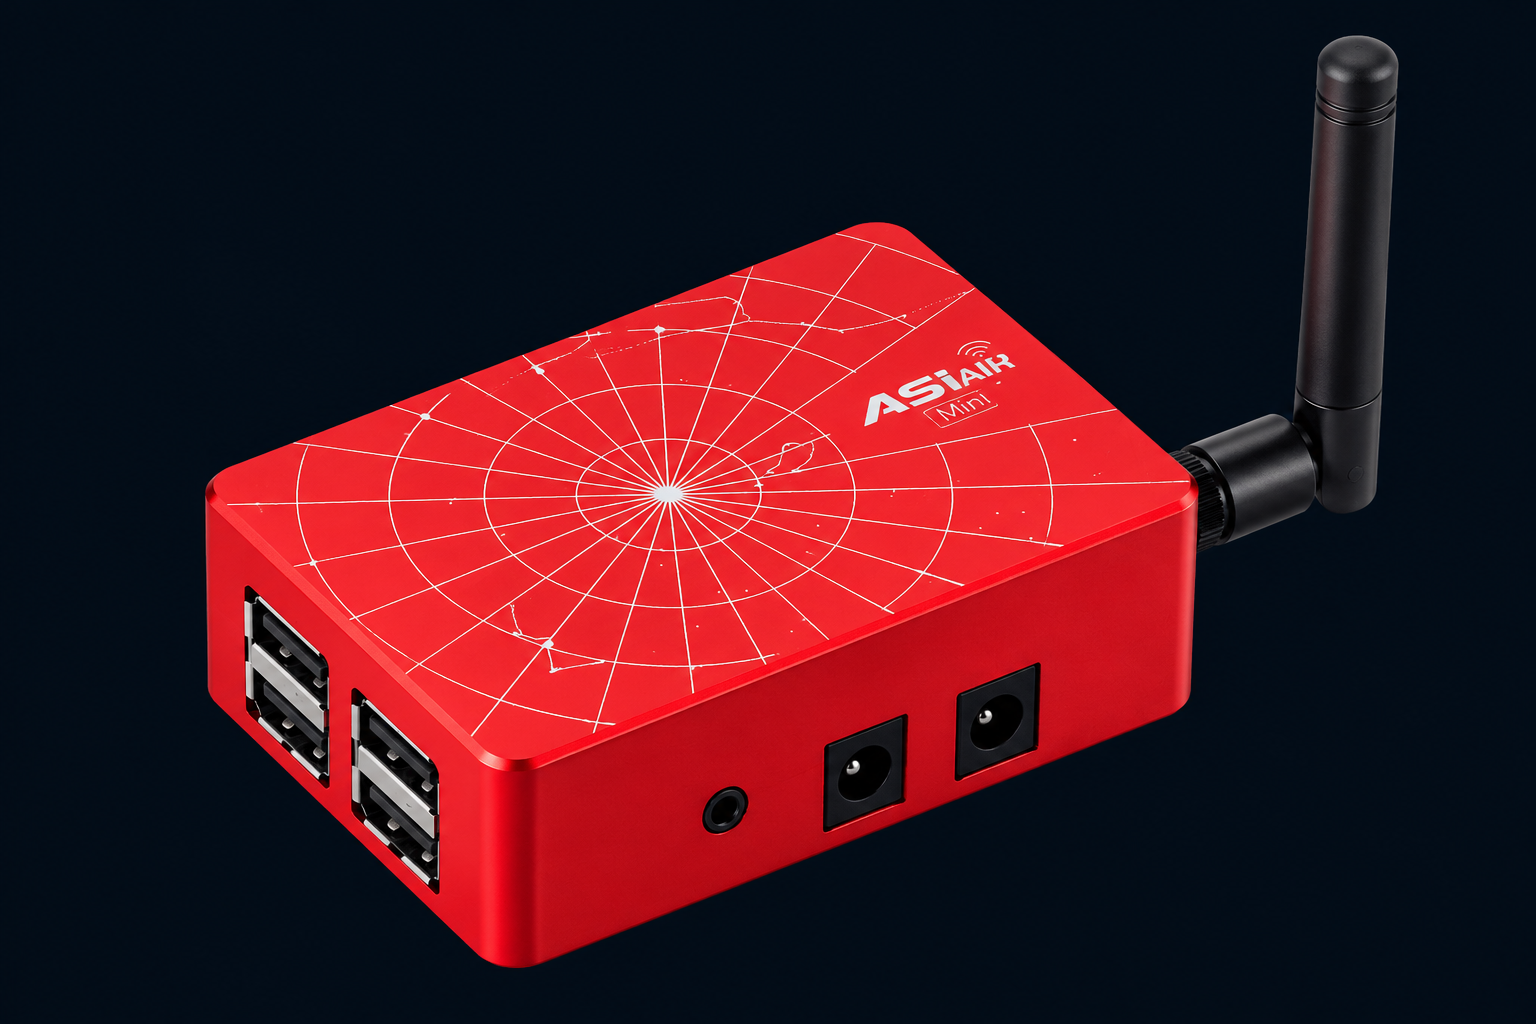
The ZWO ASIAIR Mini has been an absolute game changer for my astrophotography. It brings almost the entire imaging workflow together in one place, turning what could be a complicated, hands-on process into something far more straightforward and enjoyable.
Polar alignment is a good example. Without the ASIAIR Mini, I’d have to rely on a more manual approach, which can be a real pain. Its built-in polar alignment routine makes the process much easier and more precise. Then there’s target selection. The Sky Atlas allows me to look up a galaxy or nebula, slew the mount to it and capture a preview to check the positioning, orientation and framing before committing to a full imaging session. Getting the camera orientation right is particularly important if you want to frame an object exactly as intended.
It also manages guiding, allowing the mount to make continuous corrections to keep stars sharp during long exposures. Once everything is set up, I can programme an entire night’s imaging run, specifying exposure length and the number of subframes to capture, while the ASIAIR Mini handles the sequence and stores the images. Its Live Mode is another excellent feature, stacking images as they arrive so I can watch a deep-sky object gradually emerge on screen. It’s a genuinely satisfying way to see what the camera is capturing.
I’m yet to find a significant drawback. Some astrophotographers criticise the ASIAIR for tying users into the ZWO ecosystem, limiting their choice of compatible equipment. That’s a fair consideration, but for me, the convenience and integration outweigh that concern. When a system works this well and simplifies so many parts of the process, I can see why it has become such an important part of my setup.
For my astrophotography, the ASIAIR Mini isn’t just a controller; it’s the command centre for the entire imaging session.
Software
When I first started astrophotography, I tried using Adobe Photoshop because I already had some experience with it. However, I quickly found it frustrating. Photoshop is an excellent general-purpose image editor, but it isn’t designed specifically for astrophotography. I found tasks such as colour calibration and stretching faint details out of the background unnecessarily difficult compared with dedicated astro-processing tools.
The monthly subscription was another issue. If this hobby was going to become a long-term commitment, I couldn’t justify paying a recurring fee for software I would never actually own. I cancelled my subscription, even receiving a cancellation fee for the privilege. Needless to say, Adobe didn’t win me over.
After looking at the alternatives, I discovered PixInsight, and it has become the centre of my entire processing workflow. Its one-time licence, ongoing updates and extensive collection of astrophotography-specific tools made it a much better fit for my needs. There’s also a wealth of tutorials, guides and community resources available online.
Despite its reputation for having a complicated interface, I find PixInsight relatively easy to navigate. The real challenge is mastering the processing itself. The learning curve is steep, and I’m still discovering how different processing decisions affect the final image. Sometimes I process the same data and end up with noticeably different results. I suspect that’s part of the learning process: understanding that processing isn’t simply about revealing detail, but also about making considered decisions about colour, contrast, noise and the overall appearance of an image.
I use PixInsight for the entire workflow, from stacking my individual subframes into an integrated image through to the final processing. It’s a powerful piece of software, and I feel I’m only scratching the surface of what it can do.
Other Useful Apps
Stellarium — Planning the Night
Stellarium is an invaluable planning tool. I use the mobile app to see where targets are in the sky, how their position changes throughout the night and when they’ll be best placed for imaging. It helps me plan a session before I even set up the equipment.
Clear Outside — Weather Forecasting
Clear Outside is my go-to weather app for astrophotography. It provides detailed forecasts covering cloud cover, transparency, seeing, humidity and other conditions that can make or break an imaging session. It’s specifically geared towards astronomers, and I’ve found it a useful and generally reliable guide when deciding whether a clear night is worth staying up for.
Affiliate Disclosure
Some links on West Coast Cosmos are affiliate links. This means I may earn a small commission if you purchase a product through these links, at no additional cost to you. I only link to equipment and products relevant to astrophotography and my own experience. Any commission helps support the running of this website.